On macOS it may be necessary to temporarily disable iCloud Private Relay to help fix email or other connection issues.
Disabling iCloud Private Relay to help fix email connection issues is useful in order to get your proper IP address that may be blocked from connecting to your email server.
Here are the steps to disable iCloud Private Relay.
1. Open System Settings:
Click on the Apple menu in the top-left corner of your screen.
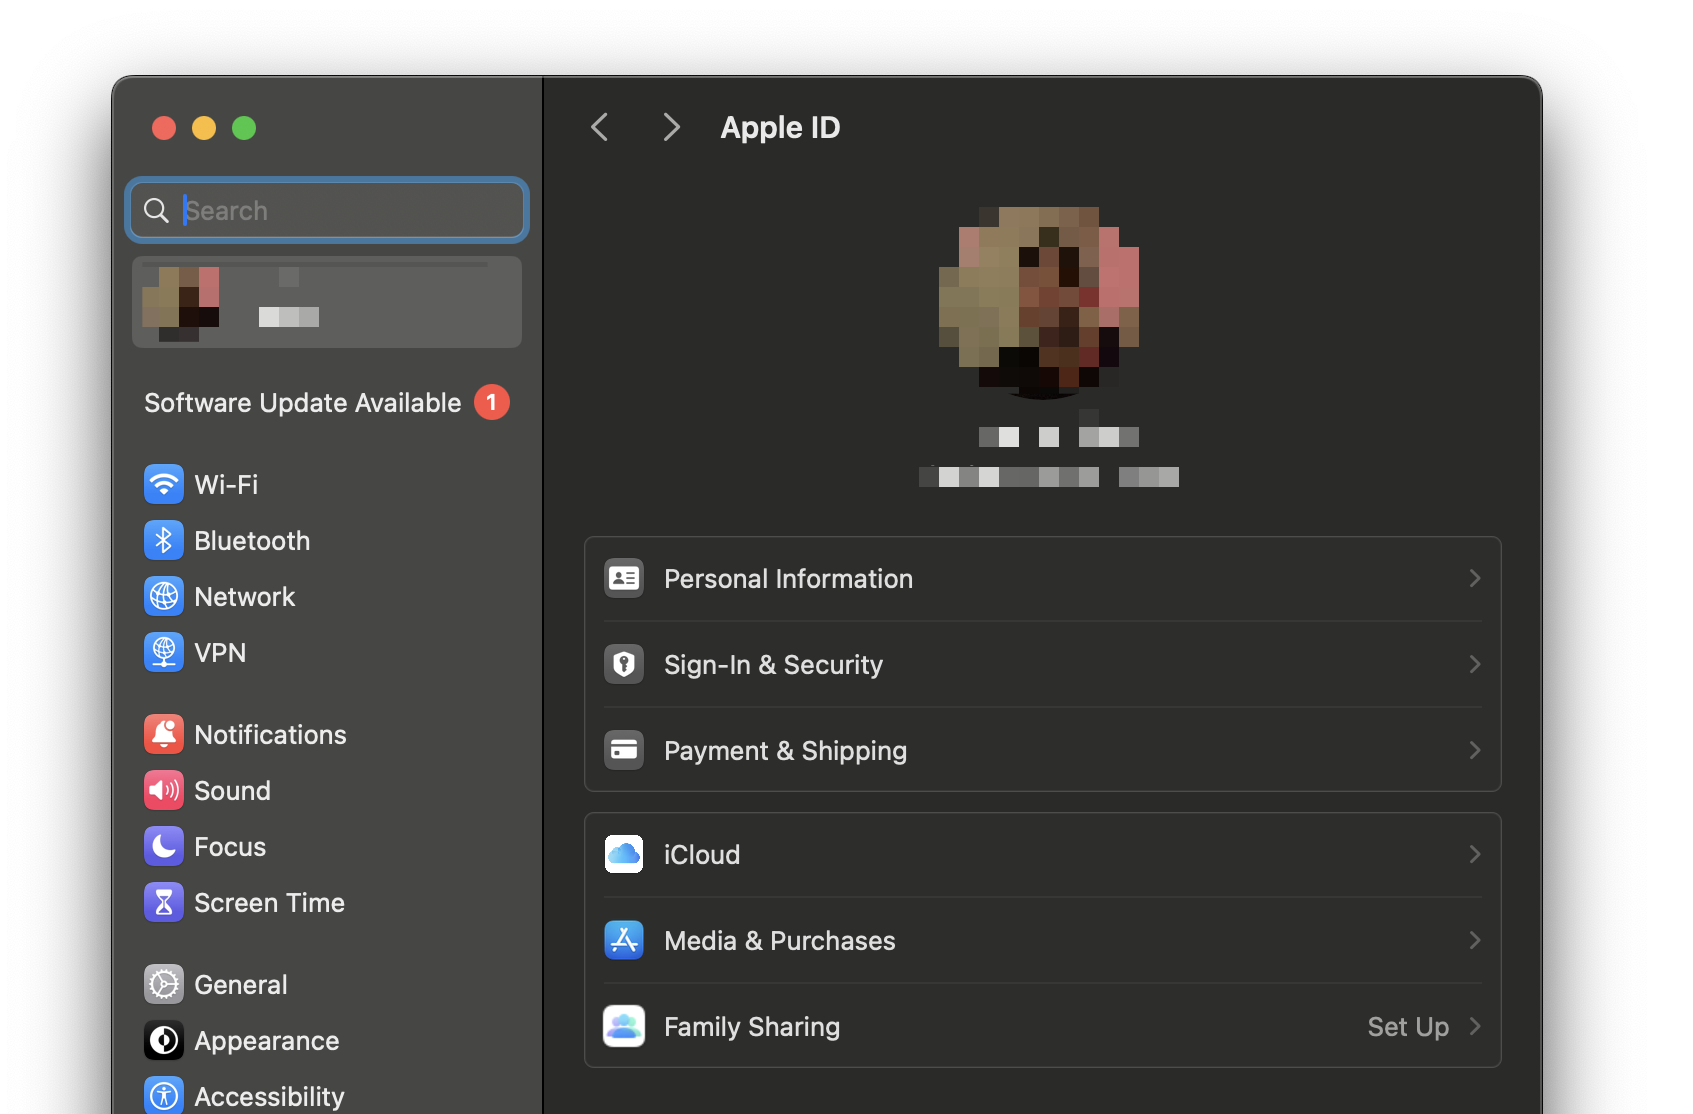
Select "System Settings" from the drop-down menu and you will see the following dialog.

2. Go to Your Apple ID Settings:
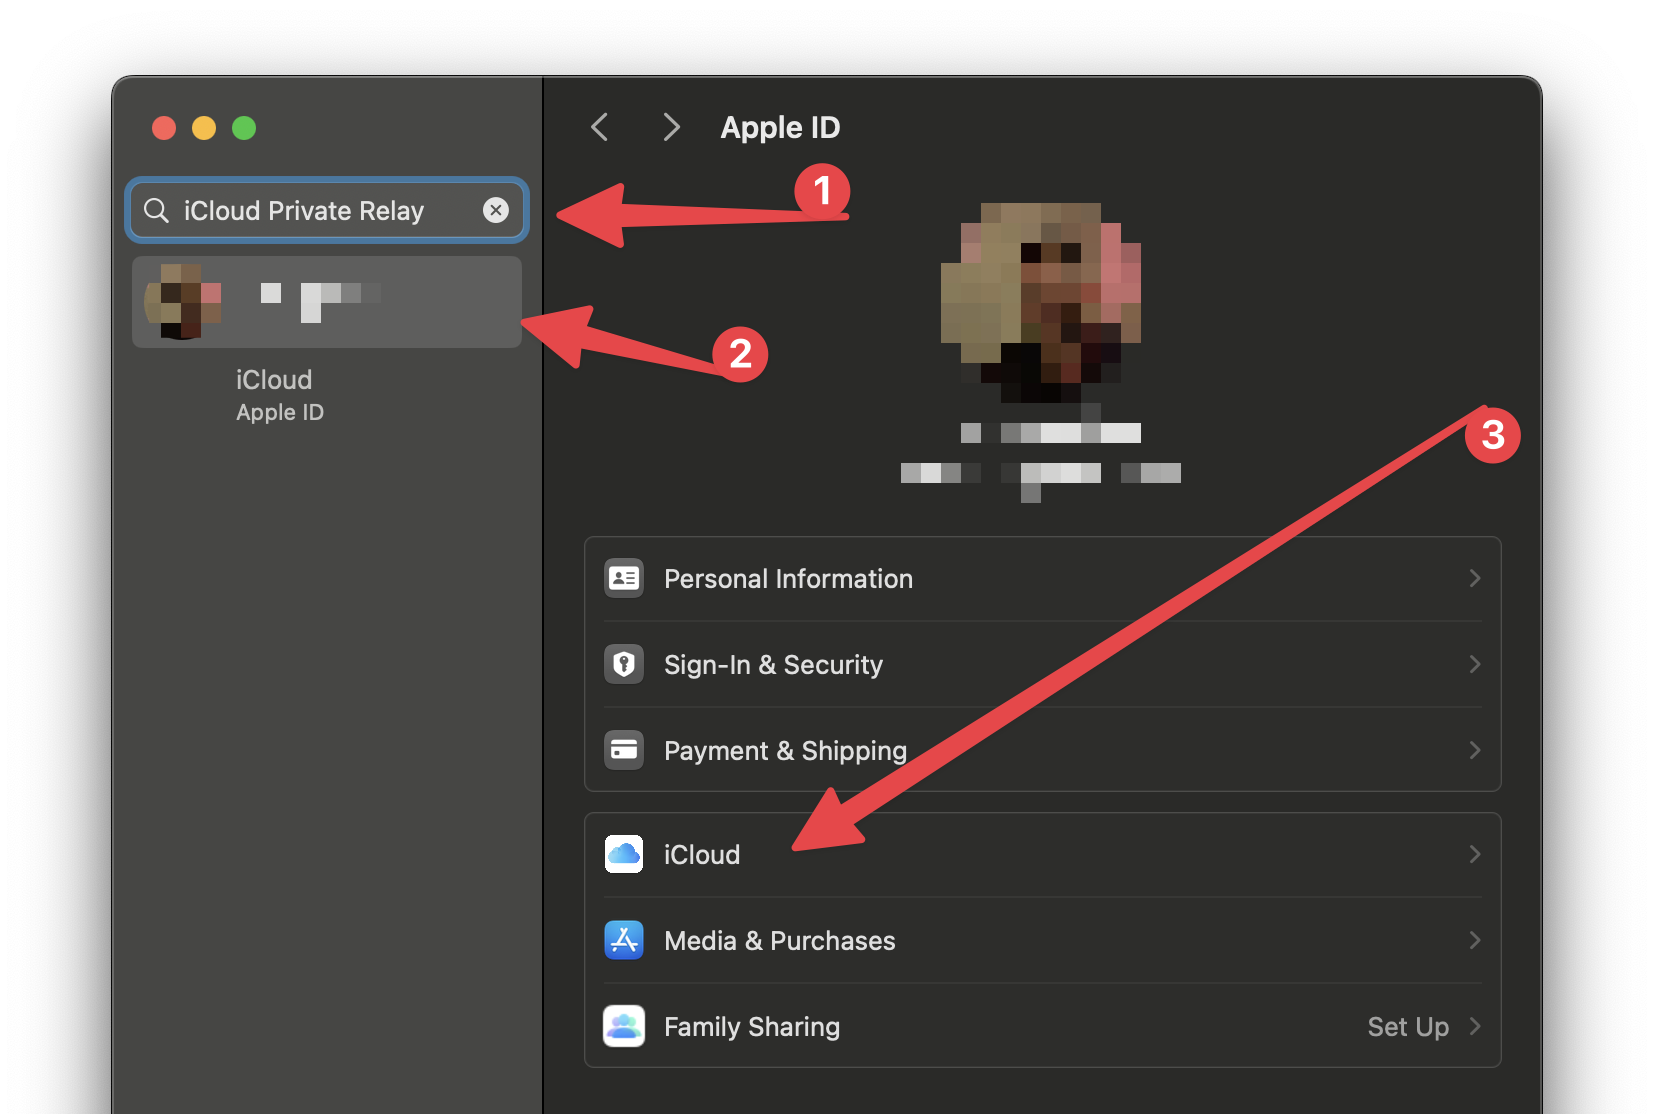
In the System Settings window, click on your name at the top or "Apple ID" if your name doesn't appear.
Then select 'Cloud' as shown below

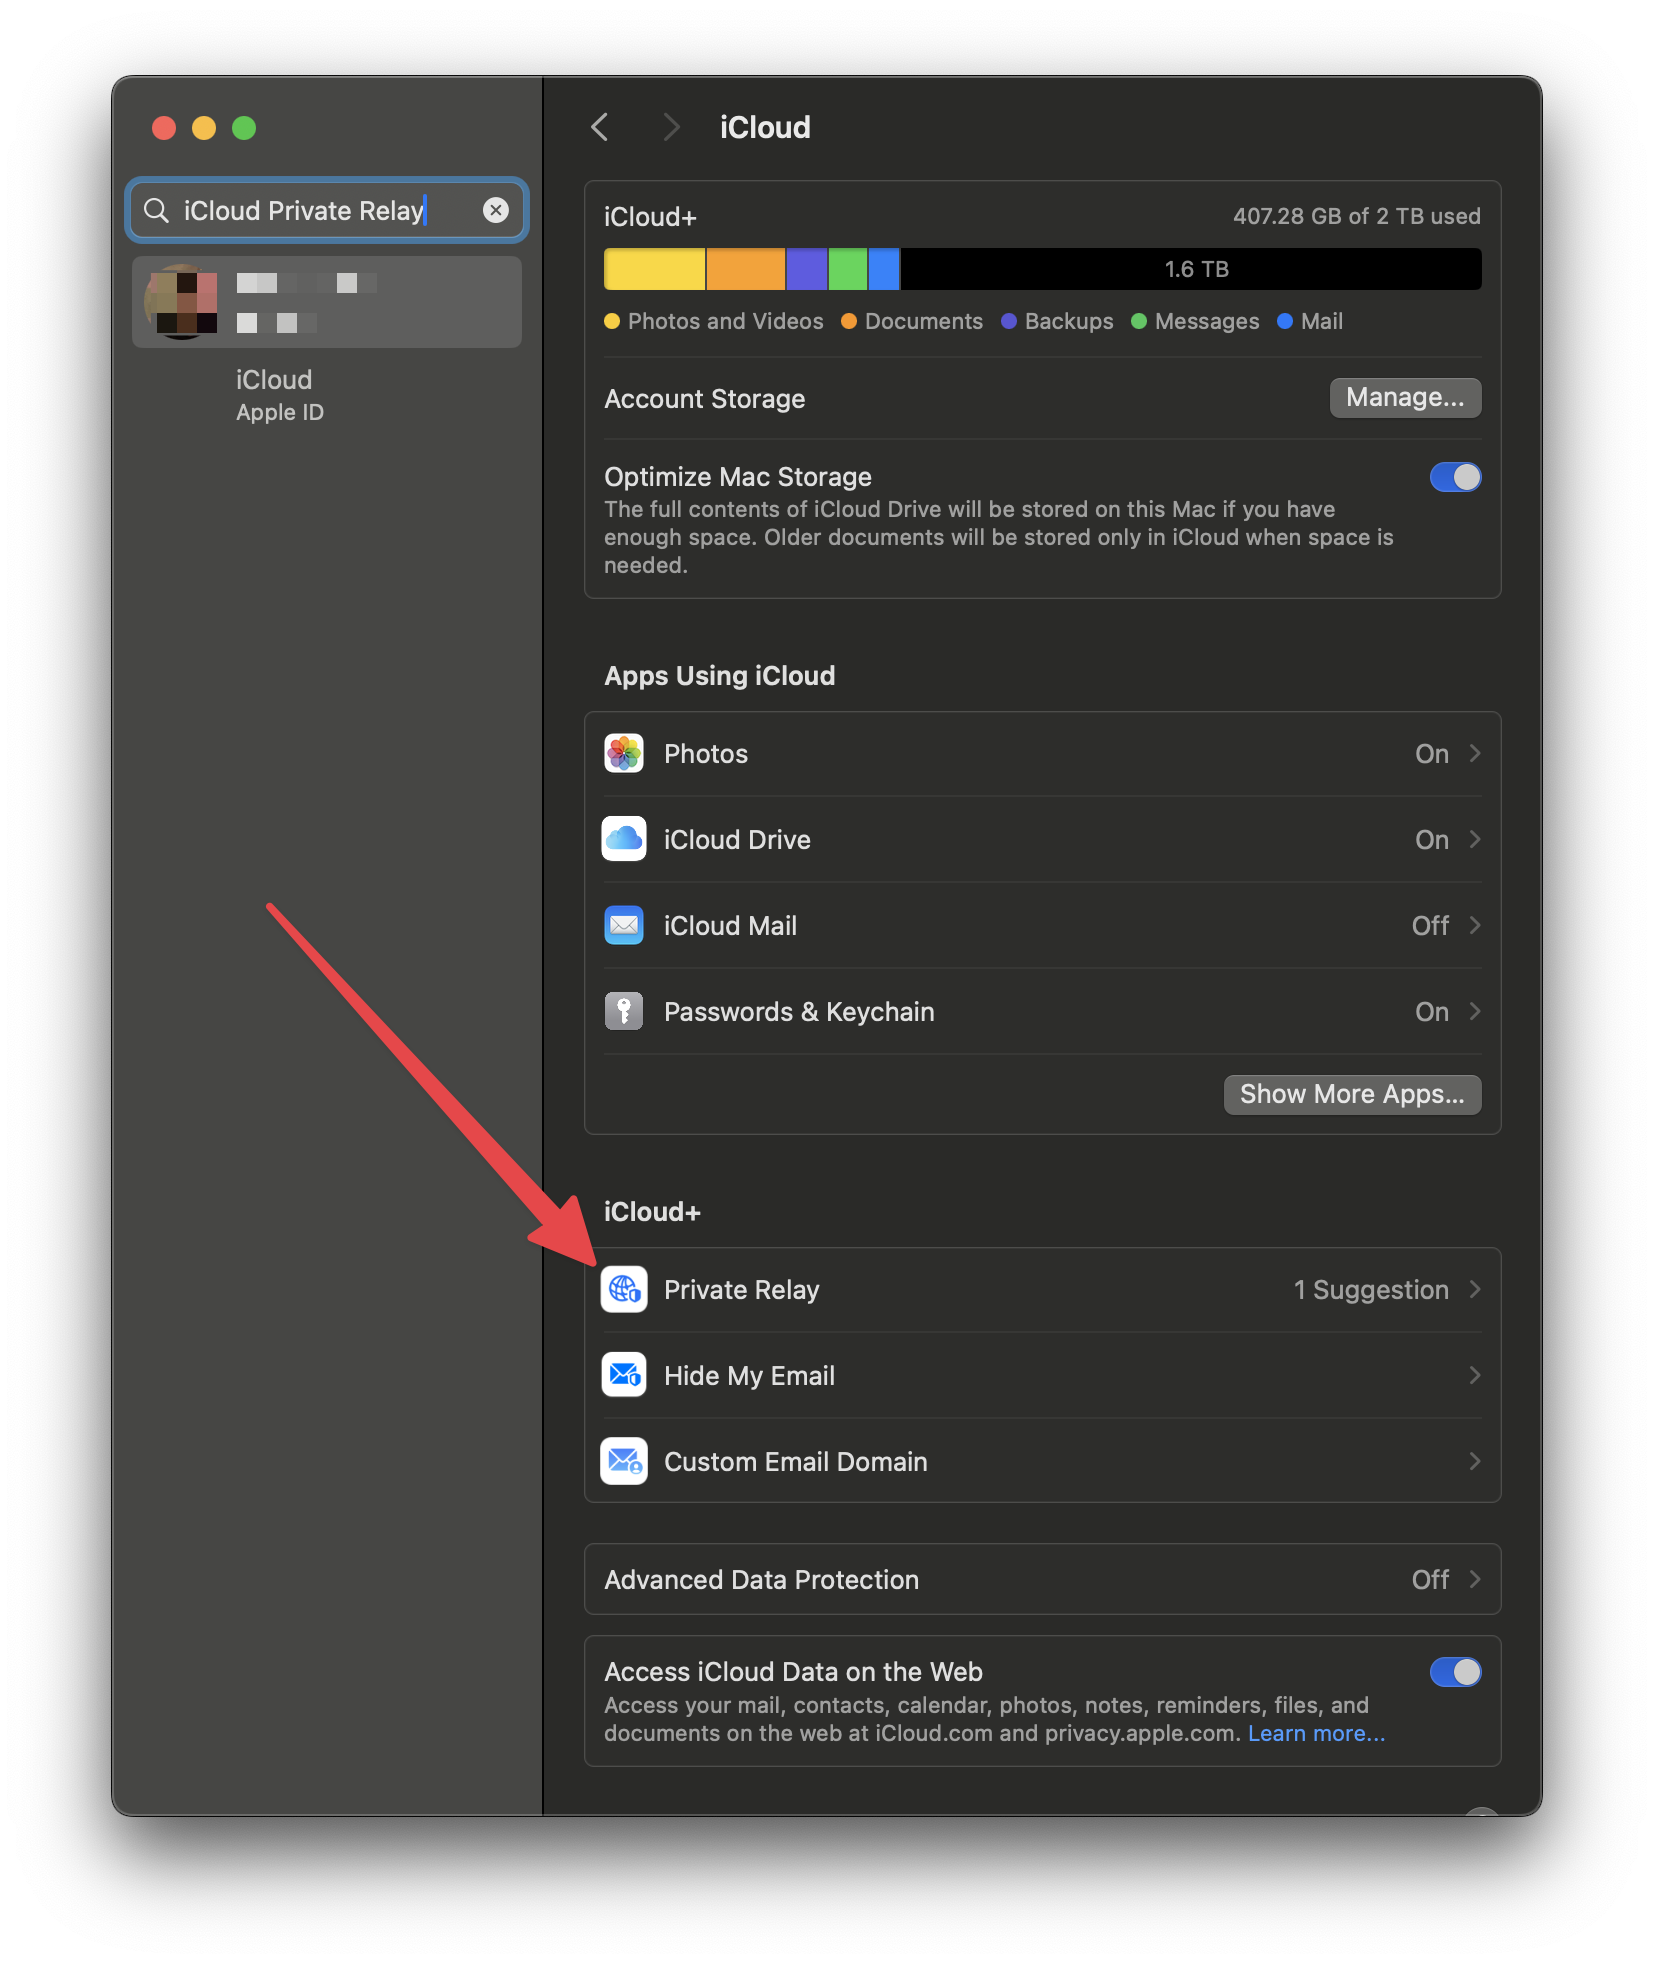
3. Find iCloud Private Relay:
Scroll down in the iCloud settings until you see "Private Relay" under the iCloud+ header.

4. Turn Off Private Relay:
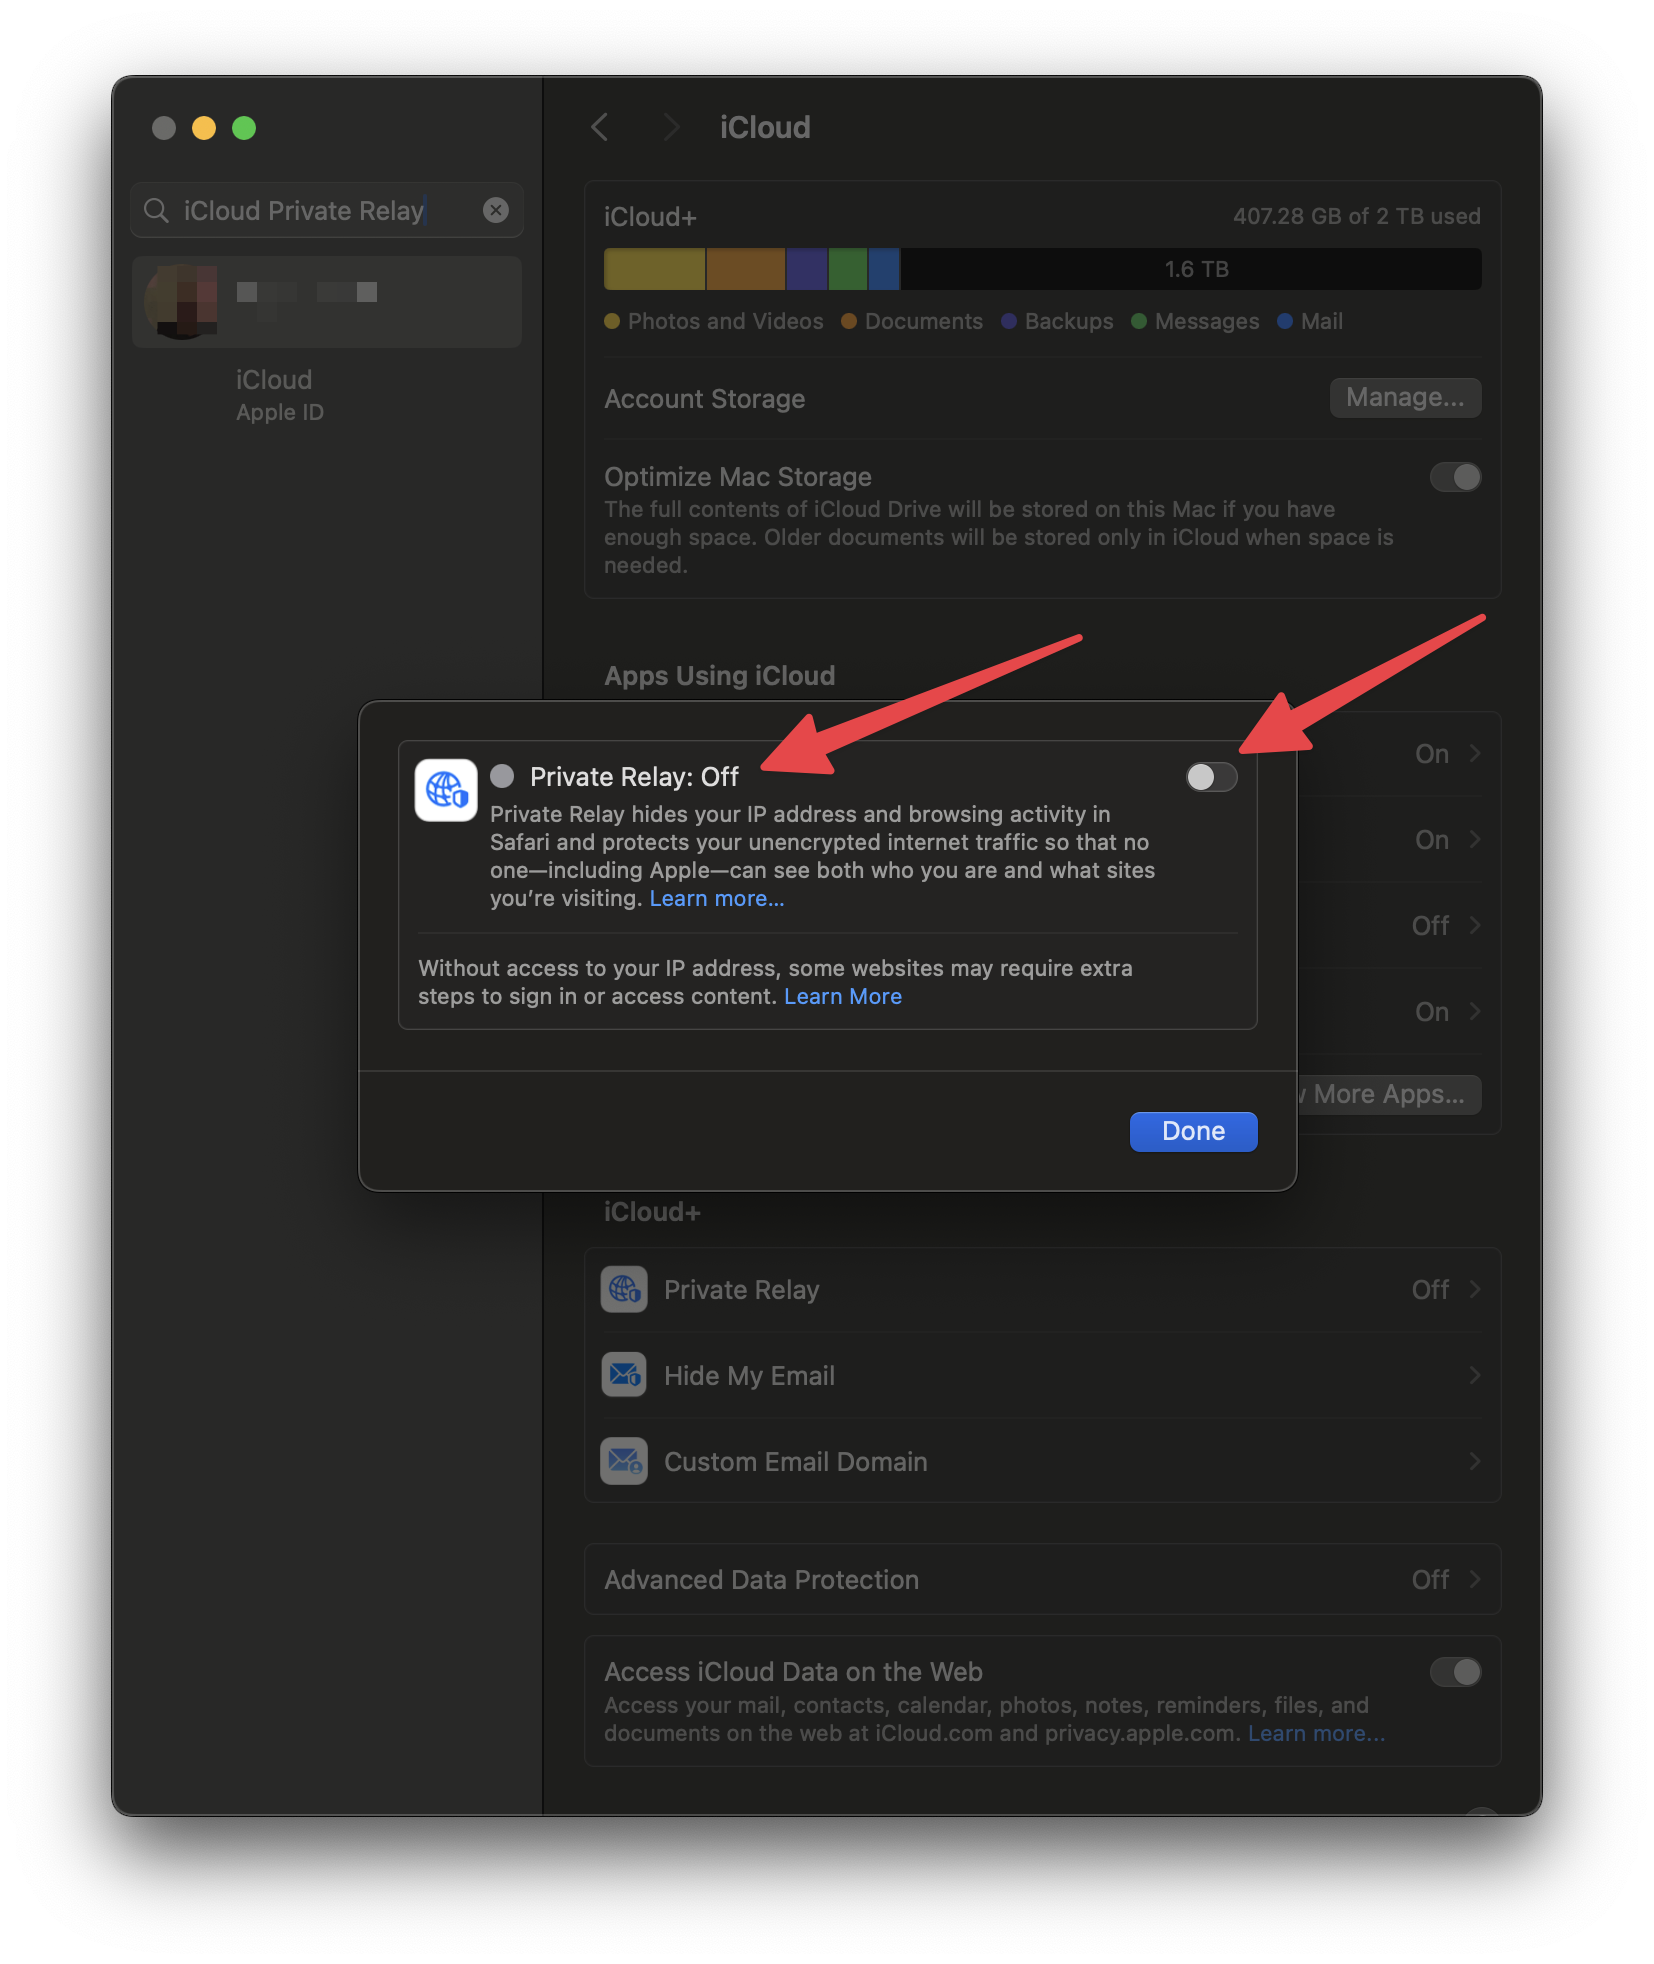
In the Private Relay settings, you will see an option to turn it off.
Click the switch to turn it off.
Confirm by clicking "Turn Off Private Relay" when asked (you can re-enable it later)

5. Get your Public IP Address
Once iCloud Private Relay is disabled enter the following into Google or any search engine to get your Public IP Address. You can send this to support to unban your IP address or login to your client area to automatically unban your IP.
Check to see if you continue having issues with your email or website.
